 公開日
公開日 最終更新
最終更新 記事区分
記事区分OpenCV Python を用いた、画像の基本的な扱い方を把握します。
切り出し Region of Interest (ROI)
RGB で処理するために Matplotlib を利用することにします。
from matplotlib import pyplot as plt
import matplotlib.image as mpimg
img = mpimg.imread('./myimage.png')
画像サイズの確認
img.shape
(200, 200, 4)
指定したピクセルの R 値を取得および変更
img.item(0,0,0)
img.itemset((0,0,0), 1.0)
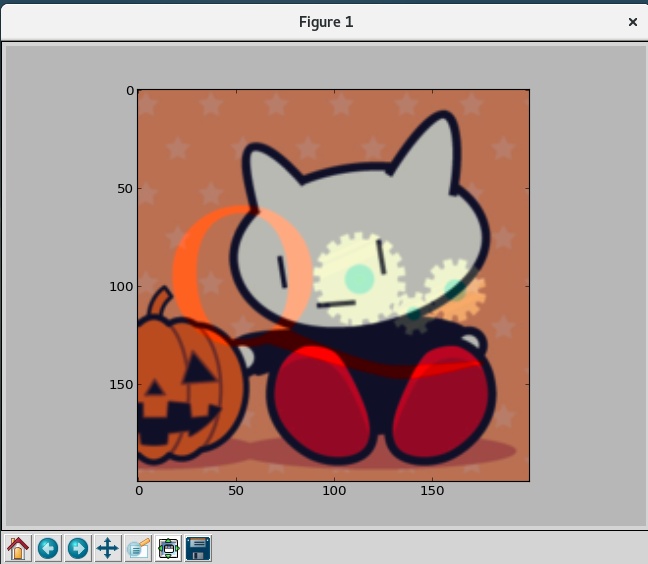
左上
part = img[0:100, 0:100]
plt.imshow(part)
plt.show()

右下にコピー
img[100:200, 100:200] = part
plt.imshow(img)
plt.show()

RGB を BGR に変換
import cv2 as cv

r,g,b,a = cv.split(img)
img = cv.merge((b,g,r,a))

plt.imshow(img)
plt.show()

ブレンド
同じサイズの二つの画像の RGB 値を比率を指定して足し合わせます。
myimg.png

myimg2.png

cv.addWeighted(img, 0.7, img2, 0.3, 0)
import cv2 as cv
from matplotlib import pyplot as plt
import matplotlib.image as mpimg

img = mpimg.imread('./myimage.png')
img2 = mpimg.imread('./myimage2.png')

img.shape
img2.shape

plt.imshow(cv.addWeighted(img, 0.7, img2, 0.3, 0))
plt.show()
ビット演算
符号無し整数 [0, 255] に範囲を変更したうえで、ビット演算してロゴ画像を別の画像に貼り付けます。
myimage.png

opencv-logo-small.png

import cv2 as cv
import matplotlib.image as mpimg
from matplotlib import pyplot as plt
import numpy as np

# RGBA の場合であっても RGB で読み込みます
# 今回はビット演算したいため、範囲を
# [0.0 ,1.0] (float32) から [0, 255] (uint8) に変更します
img_src1 = (mpimg.imread('./myimage.png')[:,:,:3] * 255).astype(np.uint8)
img_src2 = (mpimg.imread('./opencv-logo-small.png')[:,:,:3] * 255).astype(np.uint8)
#plt.imshow(img_src1); plt.show()
#plt.imshow(img_src2); plt.show()

# グレースケールに変換
img_src2_gray = cv.cvtColor(img_src2, cv.COLOR_RGB2GRAY)
#plt.imshow(img_src2_gray); plt.gray(); plt.show()

# 少しでも色がある箇所 (真っ黒 0 でない箇所) はすべて真っ黒 0 に変換します
# (逆に色がない黒い箇所 0 は真っ白 1 にします)
img_src2_maskg = cv.threshold(img_src2_gray, 10, 255, cv.THRESH_BINARY_INV)[1]
#plt.imshow(img_src2_maskg); plt.gray(); plt.show()

# RGB 画像のマスキング用に結合します
img_src2_mask = cv.merge((img_src2_maskg, img_src2_maskg, img_src2_maskg))
#plt.imshow(img_src2_mask); plt.show()

# 反転したマスキングも用意します
# bitwise への入力は符号なし整数であることが重要です。今回は uint8 です
#   0 = 00000000 => 11111111 = 255
# 255 = 11111111 => 00000000 = 0
img_src2_maskn = cv.bitwise_not(img_src2_mask)
#plt.imshow(img_src2_maskn); plt.show()

# threshold に満たなかった箇所をビット演算で 0 (真っ黒) にします
img_src2_masked = cv.bitwise_and(img_src2, img_src2_maskn)
#plt.imshow(img_src2_masked); plt.show()

# 別の画像 src1 から ROI を切り出して、src2 の色のある箇所をビット演算で真っ黒 0 にします
img_src1_masked = cv.bitwise_and(img_src1[:50,:54], img_src2_mask)
#plt.imshow(img_src1_masked); plt.show()

# ビット演算 OR でマスキングされた二つの画像を合わせます
img_src1_roi = cv.bitwise_or(img_src1_masked, img_src2_masked)
# img_src1_roi = img_src1_masked + img_src2_masked # としても同じ結果です
#plt.imshow(img_src1_roi); plt.show()

# src1 に結果を戻します
img_src1[:50, :54] = img_src1_roi
plt.imshow(img_src1)
plt.show()
img_src1

img_src2

img_src2_gray

img_src2_maskg

img_src2_mask

img_src2_maskn

img_src2_masked

img_src1_masked

img_src1_roi

img_src1

0

記事の執筆者にステッカーを贈る
有益な情報に対するお礼として、またはコメント欄における質問への返答に対するお礼として、 記事の読者は、執筆者に有料のステッカーを贈ることができます。
さらに詳しく →
Feedbacks

ログインするとコメントを投稿できます。
関連記事
- Python コードスニペット (条件分岐)if-elif-else sample.py #!/usr/bin/python # -*- coding: utf-8 -*- # コメント内であっても、ASCII外の文字が含まれる場合はエンコーディング情報が必須 x = 1 # 一行スタイル if x==0: print 'a' # 参考: and,or,notが使用可能 (&&,||はエラー) elif x==1: p...
- Python コードスニペット (リスト、タプル、ディクショナリ)リスト range 「0から10まで」といった範囲をリスト形式で生成します。 sample.py print range(10) # for(int i=0; i<10; ++i) ← C言語などのfor文と比較 print range(5,10) # for(int i=5; i<10; ++i) print range(5,10,2) # for(int i=5; i<10;...
- ZeroMQ (zmq) の Python サンプルコードZeroMQ を Python から利用する場合のサンプルコードを記載します。 Fixing the World To fix the world, we needed to do two things. One, to solve the general problem of "how to connect any code to any code, anywhere". Two, to wra...
- Matplotlib/SciPy/pandas/NumPy サンプルコード
 Python で数学的なことを試すときに利用される Matplotlib/SciPy/pandas/NumPy についてサンプルコードを記載します。 Matplotlib SciPy pandas [NumPy](https://www.numpy
 - pytest の基本的な使い方
 pytest の基本的な使い方を記載します。 適宜参照するための公式ドキュメントページ Full pytest documentation API Reference インストール 適当なパッケージ


